
How To Hang Grouped Frames on the Wall - Level & Evenly Spaced
Grouped frames and artwork are incredibly popular and it’s not hard to figure out why. Their use of design elements and style make for a great addition to any wall in your home. In today’s tutorial, we’re going to teach you How To Hang Grouped Frames. Using the Hang It Perfect™, we will show you how to hang grouped frames perfectly level and evenly spaced!

![]()
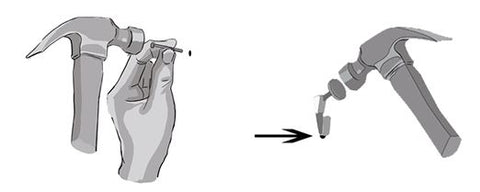
In our demonstration, the center frame has 2 pieces of hanging hardware on it's backside. Our frame didn't originally come with any hanging hardware installed, so we popped over to Walmart and picked up a small package of saw-tooth hangers for under $3. Then we used a hammer and nails to tap the saw-tooth hangers into the backside of the frame, one in the left-top corner and the other in the opposite corner (an alternative to saw-tooth hangers are D-rings. These are also available at Walmart or local hardware stores). You can easily do the same with your frame if needed!

Step 1: Align Hang It Perfect to the frame. Start by placing the crossbar of Hang It Perfect flush atop the frame. Slide the right arm of H.I.P. to align with the saw-tooth or D-ring on the right side. Then slide it up so that the hook catches the frame hardware. Tighten the knob to secure the H.I.P. arm in place. Repeat this step on the left side.

Now that both of the H.I.P. arms have been aligned with the frame hardware and secured in place, remove H.I.P. from the frame and go to the wall.
Step 2: Place Hang It Perfect with knobs against the wall with the level facing you. Align the center mark of the crossbar with the pencil mark you made on the wall. Now make sure that level is indicating that everything is straight.

Step 3: Press the back-side of the hooks so that the pin pushes into the wall making a dimple mark. This mark indicates where you will install your nail.

Note: If you’re using nails, install the nail directly into the dimple mark. If you are using a hanger, place the bottom edge of the hanger atop the dimple mark, then install.
Step 4: Hang the center frame!


All frames being 'built' off the center frame need to have a single saw-tooth hanger at the center of the frame's backside. Alternatively, a wire can be used in place of the saw-tooth hanger.

In our example, we're going to do something similar as to what we did with the center frame. We installed a saw-tooth hanger in the center of the top of the frame (instead of each corner) by simply tapping it in with a hammer and nails. If your frame already has this center saw-tooth (or a wire), you're good to move forward!
Step 1: Place the H.I.P. crossbar flush atop the frame. Slide the right arm to the end of the crossbar and tighten the knob. The yellow piece will create a ledge at the end of the crossbar that you will used later.

Now, align your frame spacing measurement on the H.I.P. crossbar with the right edge of the frame. If you’re confused about what we mean, here’s an example - if your desired spacing is 3 inches, locate the 3 in. measurement on the crossbar and line it up flush with the frame’s edge.


Next, move the left arm to align with the center of the frame's hanging hardware. Then slide the H.I.P. arm up until the hook catches either the center of the wire or the saw-tooth hanger (our frame in the sample images uses a saw-tooth hanger). Tighten the knob to secure the arm in place. You can now remove it from the frame and make your way over to the wall.

Step 2: Place H.I.P. on the wall with the ledge on the center frame's left edge. Use the level to make sure that all is straight!


Step 3: Push the hook on the bottom of the left arm so that the pin marks the wall with a dimple mark.

As a reminder, if you're using a nail, install the nail directly into the dimple mark. If you are using a hanger, place the bottom edge of the hanger atop the dimple mark, then install.
Step 4: Hang the second frame!


![]()
For the third and final frame, we are going to repeat the previous steps with a few slight modifications.
Step 1: Place the H.I.P. crossbar flush atop the frame. Slide the left arm to the end of the crossbar and tighten knob.

Next, like you did before, align your frame spacing measurement on the H.I.P. crossbar with the left edge of the frame.

Then you'll move the right arm to align with the center of the frame's hanging hardware. Slide the H.I.P. arm up until the hook catches either the center of the wire or the saw-tooth hanger. Tighten the knob to secure the arm in place and head over to the wall!
Step 2: Again, you will place H.I.P. on the wall and put the ledge on the center frame's right edge. Adjust the level to make sure it's straight!


Step 3: Push the hook so that the pin marks the wall.

Step 4: Install the nail or hanger hardware just like you've done for the other pieces. Then hang the third frame, voila!

Once the final piece is hung perfectly on the wall, you are all finished and you can admire your masterpiece! Our finished look for this guide came out looking pretty spiffy!

If you're a little confused, don't feel discouraged! Sometimes it's a lot simpler to see how it all works rather than reading it step-by-step. Watch this quick 90 second video on how hanging grouped frames can be a snap!
Alrighty! We’ve shown you how to hang grouped frames in a horizontal sequence, but be sure to check out our other post on grouped frame design ideas, click here!